Claude (web, Desktop, mobile)
The installed Claude Desktop app does not natively accept Streamable HTTP connectors, but the claude.ai web interface does, and the Desktop, iPhone, and Android apps all inherit connectors from the web account. Configure once on the web and it works everywhere.Open the custom connector dialog
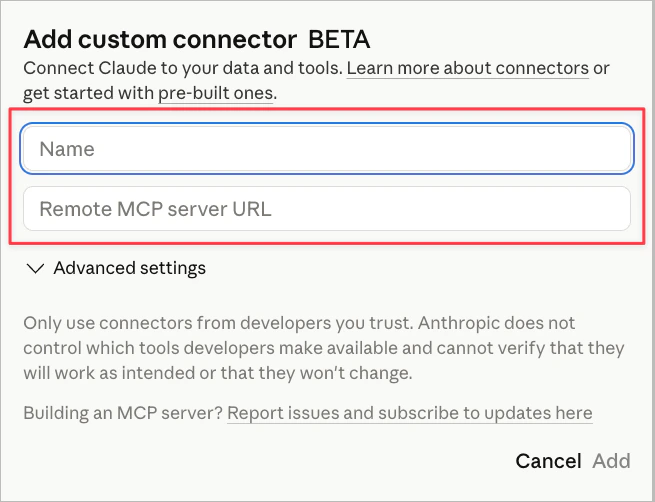
Sign in at claude.ai and open the Add custom connector dialog directly.
Authenticate
Click Add. Claude will open the Cogniscape OAuth flow. Sign in with your Cogniscape account to authorize the connector.
Claude Code (CLI)
Run this command in your terminal to add Cogniscape as an MCP server available across all your projects:/mcp inside a Claude Code session. To limit the server to a single project, replace --scope user with --scope local.
Cursor
Open Cursor and go to Settings > MCP, then click Add new MCP Server. Alternatively, create or edit the file~/.cursor/mcp.json for global access:
.cursor/mcp.json in your project root instead. The server should appear with a green status indicator in Cursor settings after saving.
Codex (OpenAI CLI)
Run this command in your terminal:~/.codex/config.toml. Restart Codex CLI to pick up the new server.
OpenCode
Create or editopencode.json in your project root and add:
opencode mcp list to verify the server is connected.